
Allows you to view, create and manage accounts associated with the water district.
Each user has a role that determines the permissions and features available within the platform.
The main roles are:
- Manager: with view and/or execution permissions over the different platform features.
The manager user must not already be registered on the SPHERAG platform.
- Grower: The grower user will have permissions over the hydrants and checkpoints that the administrator or manager has associated with them. Depending on the permissions the administrator configures when creating the water district regarding irrigation shifts, they will be able to perform different actions on them.
Create Manager User#
The creation process consists of three steps: User data, Permissions and verification.
- Click the "Create user" button.
- Fill in the fields with the new user's basic information
- Select the preferred language.
- Create a password that meets the security requirements:
- Minimum 8 characters
- Must include letters and numbers.
- Must combine uppercase and lowercase letters.
- Must include special characters (e.g. !, @, #, $).
- Repeat the password in the "Confirm password" field.
- In the User role section, select the Manager option.
- Click "Next" to continue.
The next step defines the access and execution permissions the user will have within the platform.
Each feature is shown in a table with two columns:
- View: allows access to the section's view.
- Execute: allows performing actions or modifications within that section.
Select the corresponding checkboxes according to the permissions you want to grant. The Manager user can have full view and execution permissions in all sections.
Click "Next" to advance to the last step.
Verify the user data.
If you need to make adjustments, use the "Edit data" or "Edit permissions" buttons.
When everything is correct, click Create user to complete the process.
The new user will receive an email to confirm their account. Until they complete verification, their status will appear as Pending in the user list.
Create Grower User#
The process is similar to the manager, but with limited view permissions. Follow the same steps: user data, permissions and verification.
- Click the "Create user" button.
- Fill in the fields:
- Select the preferred language.
- Create a password that meets the security requirements:
- Minimum 8 characters
- Must include letters and numbers.
- Must combine uppercase and lowercase letters.
- Must include special characters (e.g. !, @, #, $).
- Repeat the password in the confirmation field.
- In the User role field, select "Grower".
When selecting the Grower role, two additional optional fields appear:
- User identifier: allows assigning a code or reference to the grower. This identifier can subsequently be used to search and filter the hydrants associated with that grower directly from the user table.
- Note: internal message that the water district administrator can add about the user. This information is not visible to the grower user and will be displayed in the hydrant detail.
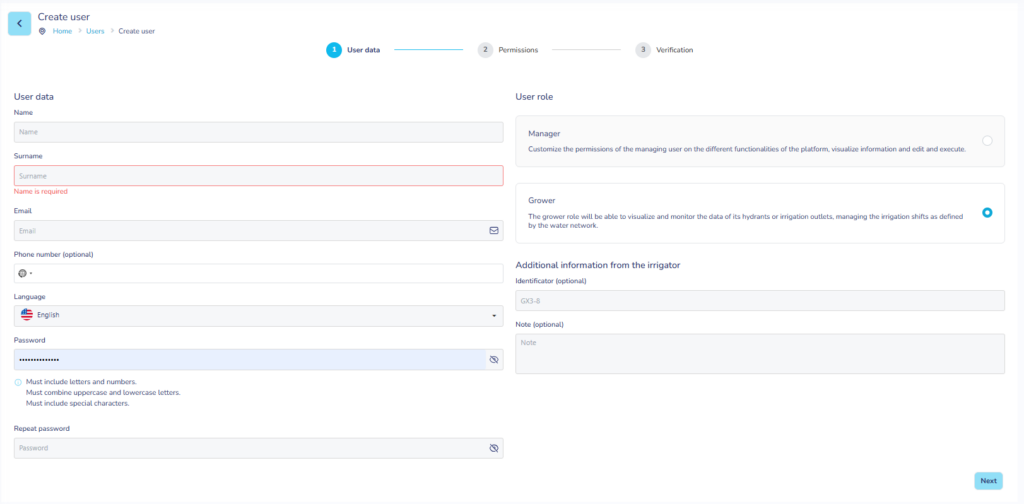
Click "Next" to continue.
In the next step, configure the associations for the grower
Select the hydrants or irrigation points the grower user will have access to. Depending on the permissions the administrator configures when creating the water district regarding irrigation shifts, they will be able to perform different actions on them. By default they will only be able to view the hydrant information without being able to perform any actions on them.
Click "Next" to continue to the final step.
Verify the user data.
If necessary, you can modify the information before saving.
Finally, click "Create user" to confirm the creation of the new grower user.
The new user will receive a confirmation email. Until they validate their account, their status will remain as "Pending" in the user panel.
General view#
The main Users screen displays a list of all users registered in the community. From this view you can consult the following information:
- Email: email address associated with the account.
- First and last name: registered identification data.
- Role: user type (Manager or Grower).
- Account status: indicates whether the account is Confirmed or Pending validation.
- Associations: number of simple hydrants or points the user is linked to.
Filters are included at the top of the table to search for users by email, name, surname, role or account status.
You can configure the visible columns using the table filters button located in the upper right corner.
Each record has an actions panel (three vertical dots icon (⋮)) from which you can access:
- Edit user
- Delete user
- Resend validation email. If the status of the account associated with the grower is Pending. The email can also be resent to confirm the account.
Filter hydrants by user identifier#
From the user table, the administrator can locate the grower whose identifier they want to consult. By clicking on the number of Associations for that user, the hydrant view is automatically filtered to show only the hydrants corresponding to that identifier.